Documentation / Customizing the Logo
Customizing the Logo
Overview
By default, the WordPress login page displays the WordPress logo above the login form. Teydea Login Customizer lets you replace it with your site icon or a custom image, and configure the link behavior and alignment.
Choosing a Logo Source
- Navigate to Settings → Login Customizer.
- Open the Logo panel in the Design tab.
- Under Logo source, select one of the following:
– Core (default WordPress.org logo) — Uses the built-in WordPress logo. When this source is selected, a Logo variant option appears where you can choose Auto (match WordPress version), Blue, or Gray (the gray variant is available on WordPress 7.0 and later). – Custom — Lets you upload or select any image from the Media Library. – Site icon — Uses the site icon configured in Settings → General (or the Customizer). This is a convenient option if you already have a site icon set.
- Click Save all settings to apply.
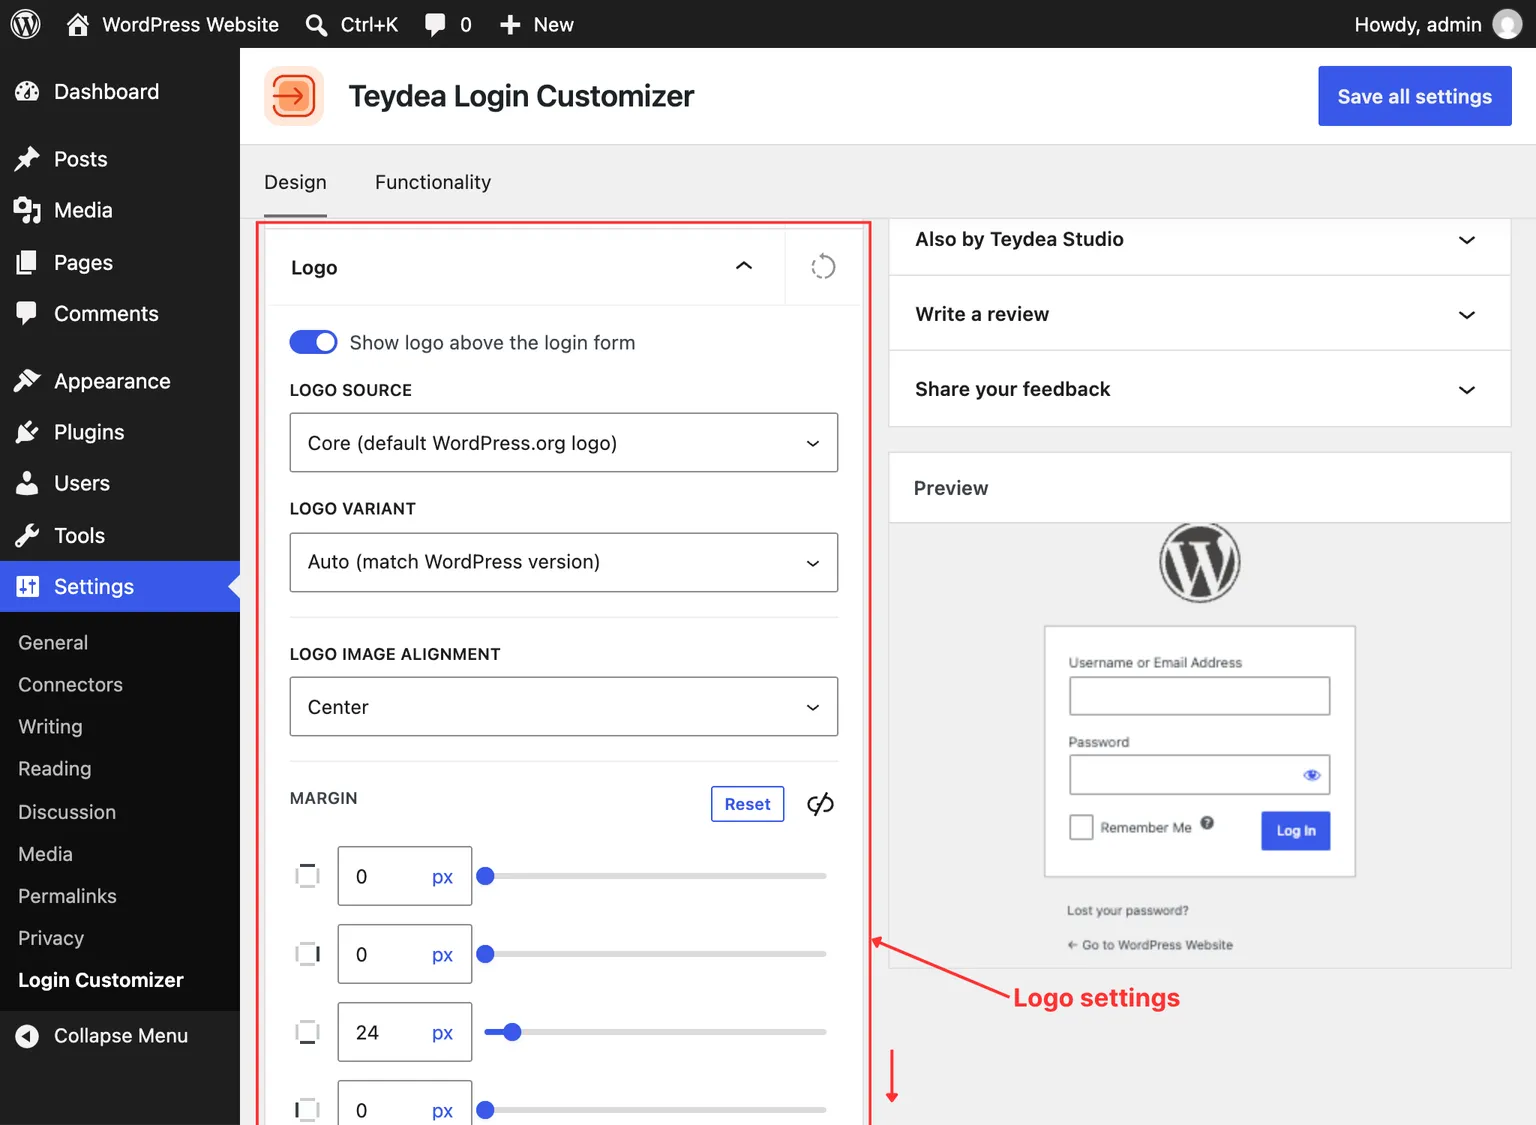
Uploading a Custom Logo
When Custom is selected as the logo source:
- Click the image upload area in the Logo panel.
- Select an existing image from the Media Library or upload a new one.
- Click Select to confirm.
- Optionally, set a Strict width value (in pixels) to force the logo to a specific width. Leave it at 0 to use the image’s natural size.
Note (Multisite — Network Admin): The Media Library is not available when configuring settings from the Network Admin dashboard. To upload a custom logo image, deactivate the plugin network-wide and activate it on individual sites instead.
Showing or Hiding the Logo
Toggle the Show logo above the login form switch in the Logo panel to control whether the logo appears on the login page. When hidden, the space above the form is empty.
Configuring the Logo Link
The logo is clickable by default. Keep Make logo a link enabled to use the link, then configure:
- Open link in new tab — Choose whether the link opens in a new browser tab.
- Logo link — Set the destination URL (defaults to
https://wordpress.org/). You may want to change this to your site’s homepage. Leave it empty to remove the link entirely and render just the image. - Logo link title — The tooltip text that appears when hovering over the logo. This field supports per-language text if multiple languages are installed.
Logo Alignment
Use the Logo image alignment setting to position the logo to the left, center, or right within its container. The default is center.
Logo Size
For a Custom logo or Site icon, set a Strict width of the logo image (px) value in the Logo panel to constrain the displayed width; leave it at 0 to render the image at its original dimensions. The logo is output as a standard image element, so it displays at full resolution rather than being cropped to a fixed box.
Logo Margin
Use the Margin control in the Logo panel to adjust the spacing around the logo — top, right, bottom, and left. By default a 24px gap is applied below the logo to separate it from the form.