Documentation / Installing the Plugin
Installing the Plugin
Installing from WordPress.org (Free Version)
- In the WordPress admin, navigate to Plugins → Add New Plugin.
- Search for Teydea Login Security in the search bar.
- Locate the plugin by Teydea Studio and click Install Now.
- After installation completes, click Activate.
The plugin is now active and ready to configure.
Installing the PRO Version (PRO)
The PRO version is distributed directly through Teydea Studio, not through WordPress.org.
- Download the PRO plugin ZIP file from your Teydea Studio Customer Portal account.
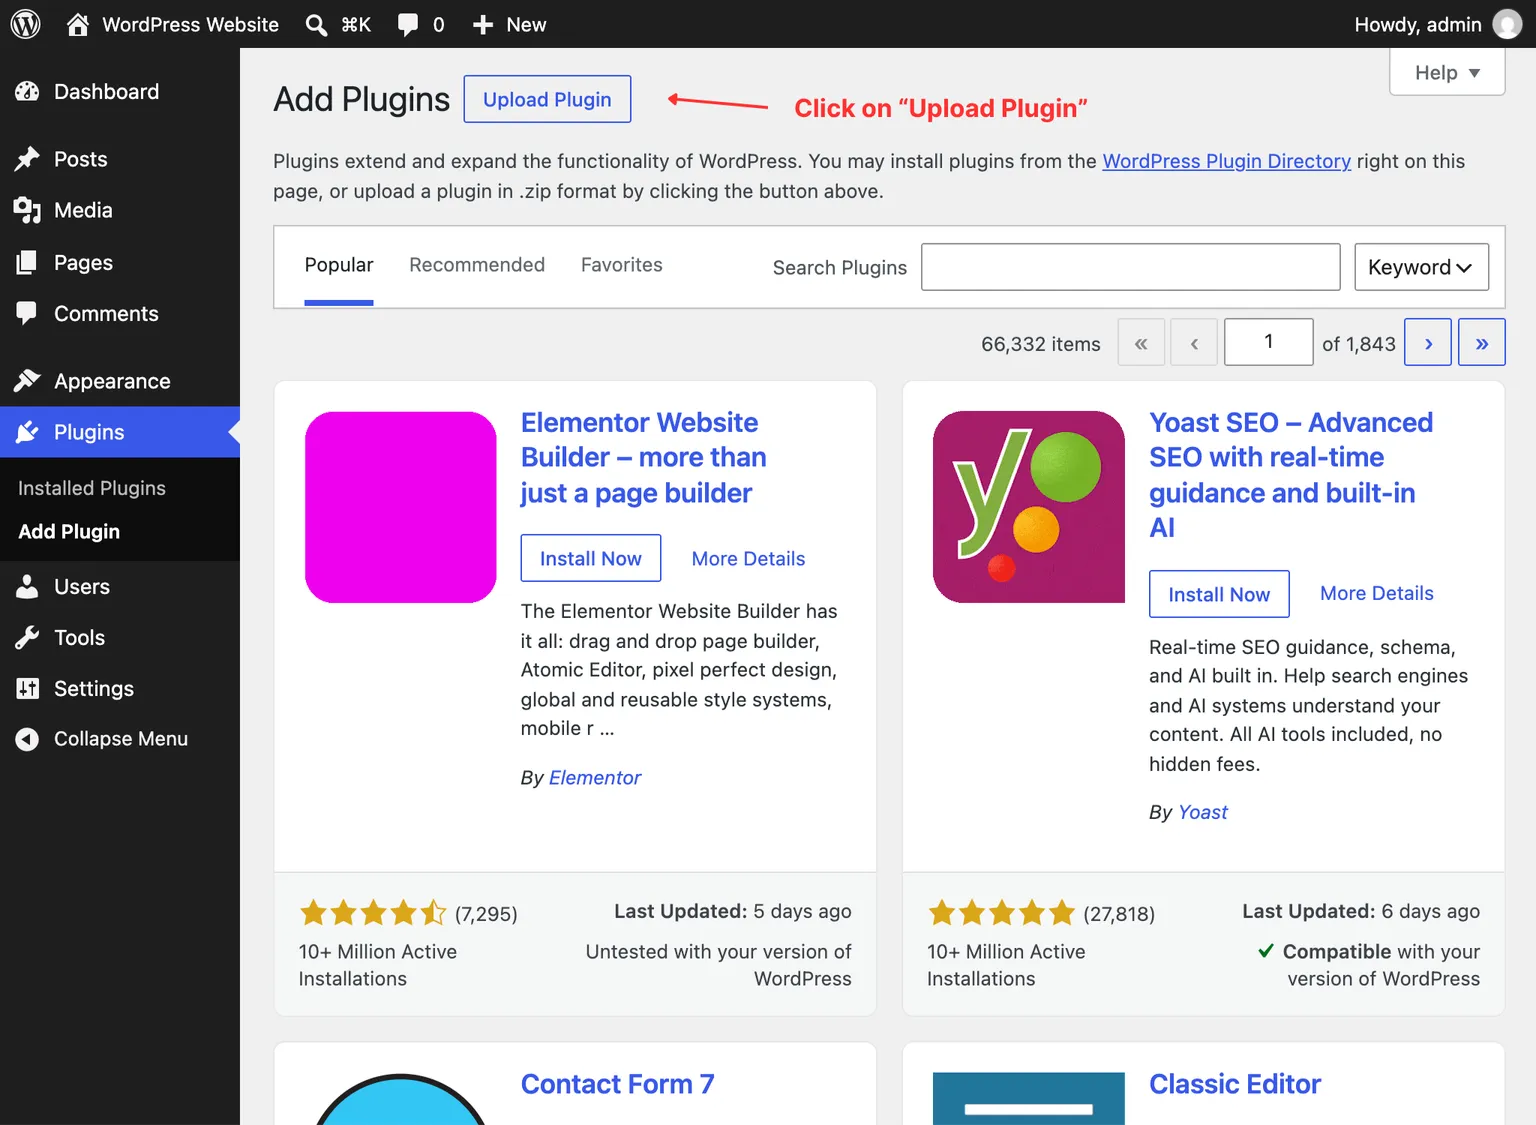
- In the WordPress admin, navigate to Plugins → Add New Plugin.
- Click Upload Plugin at the top of the page.
- Click Choose File, select the downloaded ZIP file, then click Install Now.
- After installation completes, click Activate.
If you previously had the free version installed, the PRO version replaces it automatically. When the PRO plugin activates, it defines a constant that prevents the free version from loading. You do not need to deactivate the free version first, but keeping only the PRO version active is recommended to avoid confusion.
Verifying the Installation
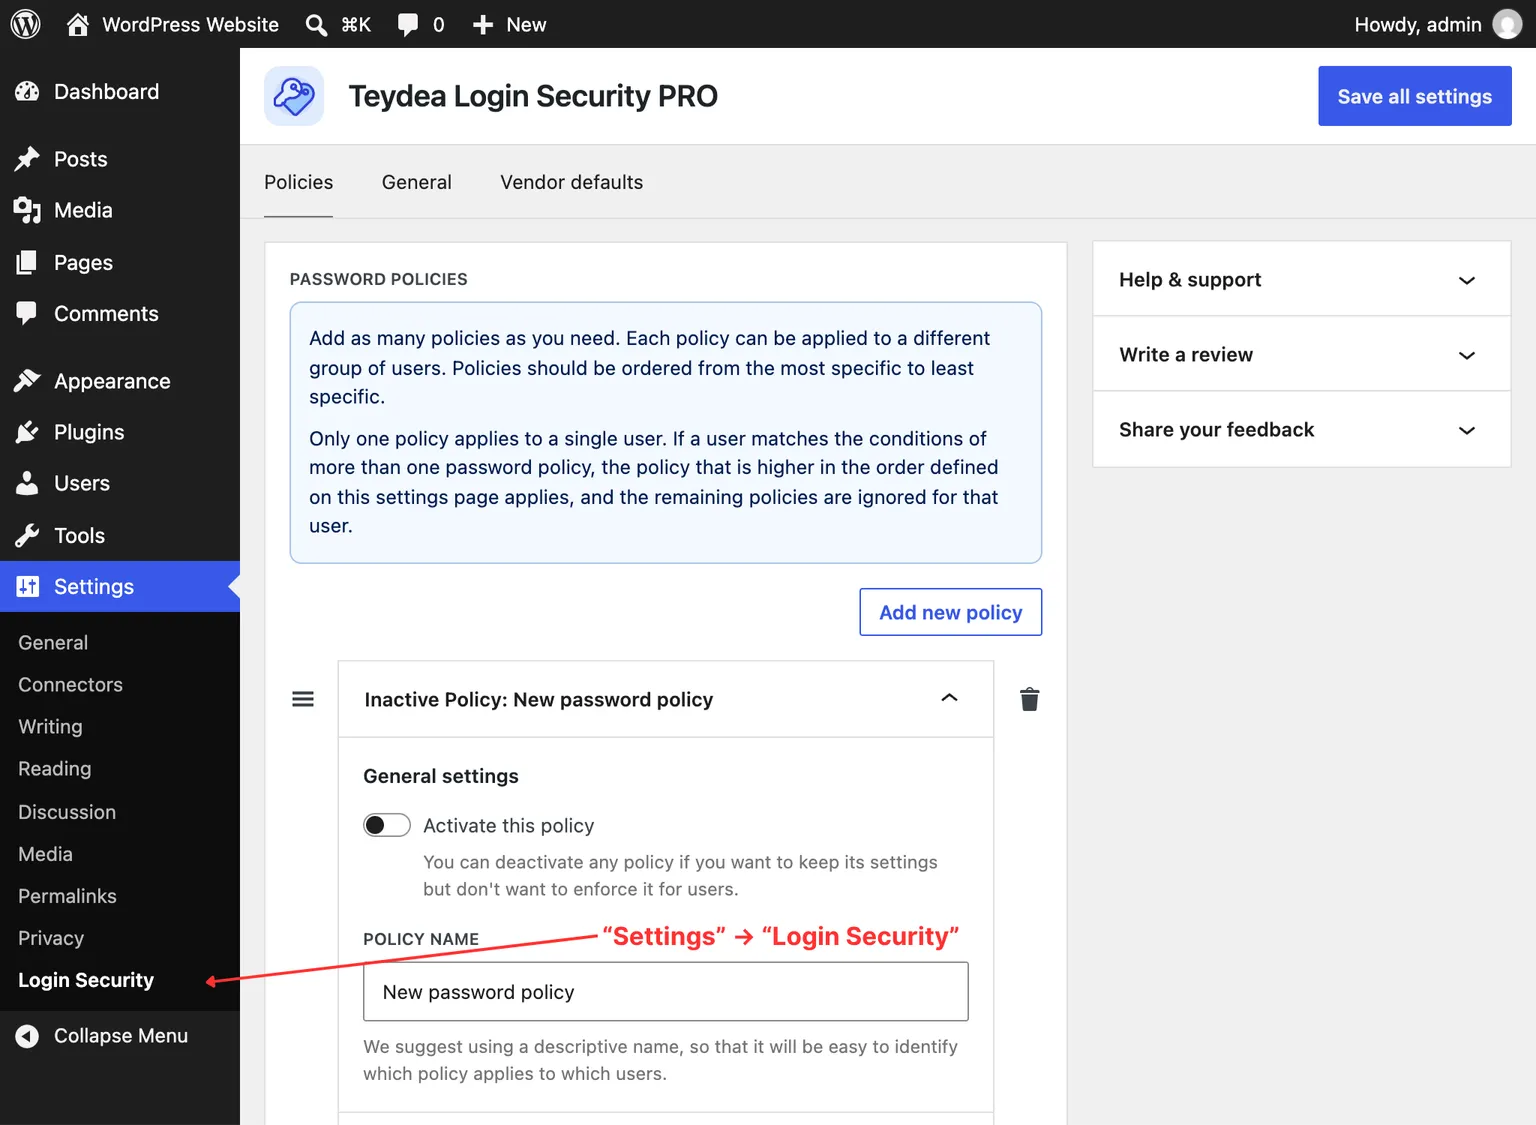
After activation, navigate to Settings → Login Security in the left sidebar. You should see the settings page with a Policy tab selected by default. The page heading reads Login Security (or Login Security PRO when the PRO version is active).
Multisite Installation
Teydea Login Security supports WordPress multisite networks. You can activate the plugin network-wide or on individual sites within the network. When activated on a site, the password policy applies to that site’s users.
Network-Wide Activation
To activate the plugin across all sites in the network, go to Network Admin → Plugins and click Network Activate next to Teydea Login Security.